How to Make a Rustic Wooden Serving Tray: A Beginner's Guide
Welcome to LoveWoodCraft! If you're looking for an easy woodworking project that combines functionality with rustic charm, a wooden serving tray is a perfect choice. This step by step guide to making a rustic wooden tray will walk you through the process of crafting your very own tray, ideal for entertaining or as a decorative piece in your home.
Materials Needed for a Rustic Serving Tray
Before diving into the project, gather the following tray making supplies:
- Wood (Pine or Cedar are great choices for a rustic finish)
- Wood glue
- Wood screws
- Sandpaper (various grits)
- Wood finish (stain or sealant)
- Handles (optional)
- Clamps
- Measuring tape
- Square
- Saw (hand saw or miter saw)
Step-by-Step Guide to Making a Rustic Wooden Tray
Let’s get started with this easy rustic tray project for beginners! Follow these detailed steps:
Step 1: Choose Your Wood
Select the best wood for making a serving tray. Pine or cedar is ideal due to its availability and ease of use. For a more unique look, consider reclaimed wood.
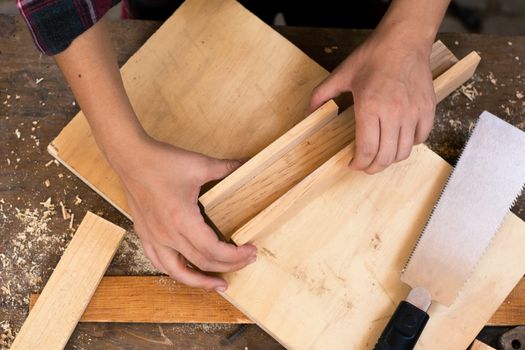
Step 2: Cut the Wood
Measure and cut your wood into the desired dimensions. A common size for a serving tray is 18" x 12". Remember to cut pieces for the sides as well.
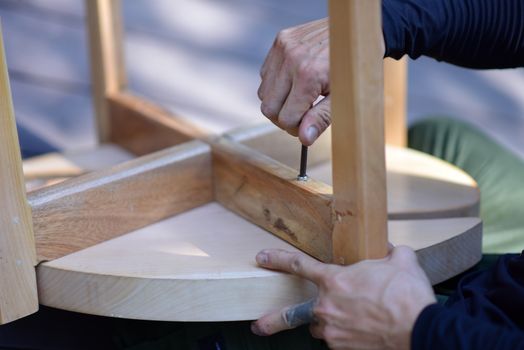
Step 3: Assemble the Tray
Using wood glue, attach the side pieces to the base of the tray. Reinforce with wood screws for durability. Ensure everything is square and aligned properly.
Step 4: Sand the Edges
Once assembled, use sandpaper to smooth the edges and surfaces. Start with a rough grit and gradually move to a finer grit for a polished finish. This step is crucial in achieving a professional look.
Step 5: Apply Finishing Techniques
Now it’s time to enhance your tray with wood finishing techniques. Apply a wood stain to bring out the natural beauty of the grain, or use a clear sealant to protect the wood. Be sure to follow the manufacturer's instructions for drying times.
Step 6: Customize Your Wooden Serving Tray
To give your tray a personal touch, consider adding handles. You can purchase decorative handles or make your own using rope or leather strips. This customization will not only enhance the design but also add functionality.
Practical Tips for Beginners
Here are some beginner woodworking tips to help you succeed:
- Always measure twice before cutting.
- Invest in quality tools for better results.
- Don’t rush the finishing process; it’s key to a beautiful outcome.
- Explore resources like Ted's Woodworking for more project ideas and guidance.
- Practice safety by wearing goggles and a mask when sanding and cutting.
Frequently Asked Questions
1. What type of wood is best for a rustic serving tray?
Pine and cedar are popular choices due to their natural beauty and ease of workability. Reclaimed wood can also add unique character.
2. How do I finish a wooden serving tray?
For finishing, apply wood stain for color and then seal with a clear coat to protect the surface. Make sure to allow adequate drying time between coats.
3. Can I make a serving tray without power tools?
Yes! This wooden tray tutorial can be completed with basic hand tools. Just be patient and take your time for accurate cuts and assembly.
Conclusion
Creating your own rustic wooden serving tray is a rewarding project that enhances your woodworking skills while adding a touch of charm to your home. With just a few materials and the right techniques, you'll have a beautiful serving tray that’s ready for use or as a thoughtful gift. Remember, the key to success in woodworking is practice and patience, so don’t hesitate to try out different designs and finishes. Happy crafting!
🔨 Want 16,000+ Woodworking Plans?
Ted's Woodworking gives you instant access to over 16,000 step-by-step plans with detailed blueprints, cut lists, and material lists for every project.
Get Instant Access →